Photoshop CC 2020 New Features
- December 03, 2019
- by
Adobe has released Photoshop CC 2020, the latest update to its flagship
image-editing application. The new version brings some seriously useful
new features, including new Warp capabilities, better automatic
selection, and a range of minor interface changes that combine to make
you more productive. Here’s our guide to the best features in the
update.


Better Auto Selections
The Select Subject command has been enhanced, due to Adobe
Sensei – their name for the artificial intelligence that allows
Photoshop to analyze an image and guess at what you want to select. In
practice, it’s remarkably good at its job: in this image of a car on a
complex background, Photoshop has successfully selected the car almost
perfectly. There’s still some minor tweaking to be done, but it’s an
impressive first step.
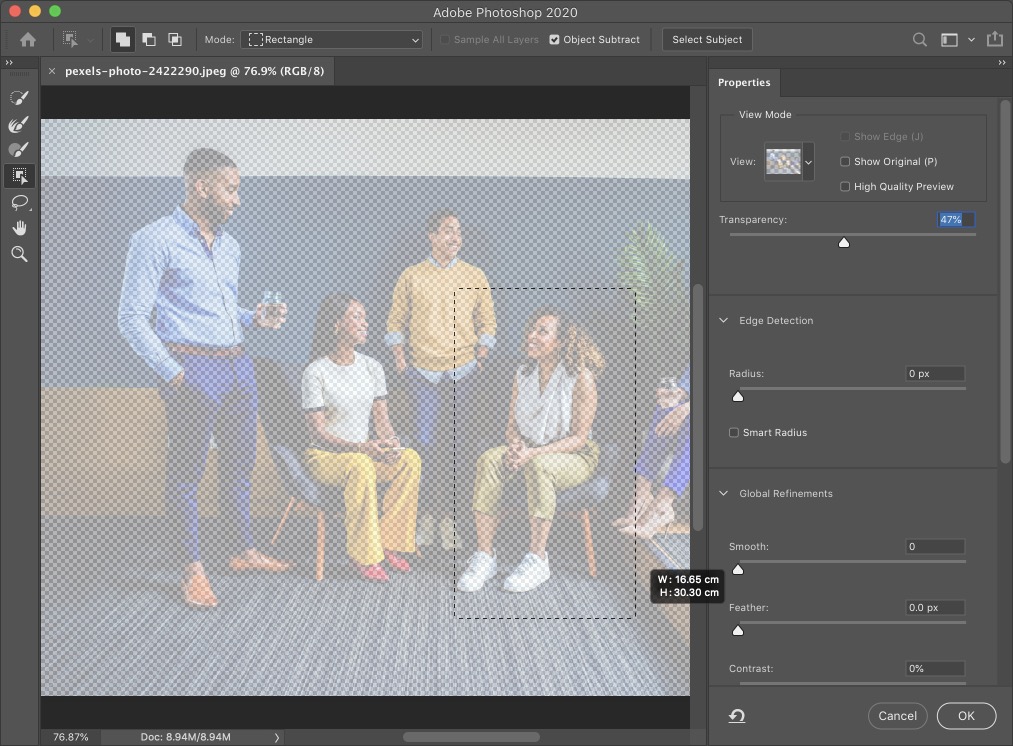
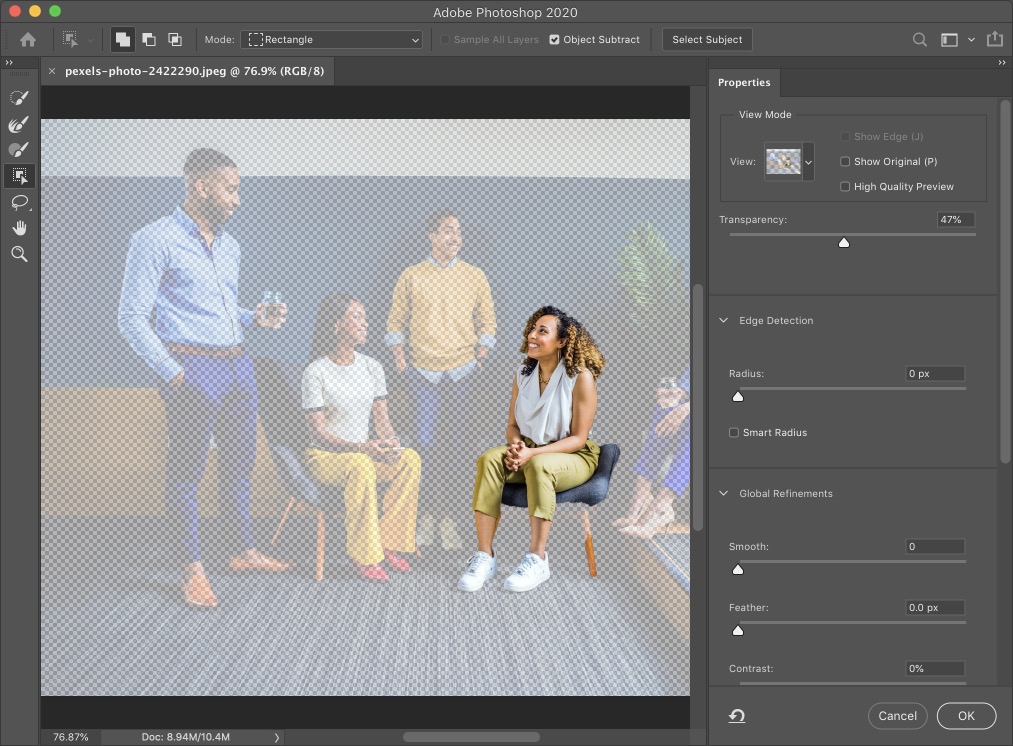
Selective Selections
The Select and Mask dialog (formerly known as Refine Edge)
has always incorporated a Quick Selection brush. Now there’s a new
tool, which lets you make a selection around the object you want to
isolate: in this case, it’s the woman sitting on the right.
After making a rectangular selection, Photoshop
automatically finds the subject within that area, making it easy to
separate one person from among a group.
Enhanced Properties Panel
For several versions now, the Properties Panel has been
the go-to location for information about the current layer. It has
received major enhancements in this release, with context-sensitive
additions that depend on the layer and current tool type. It also now
contains Quick Actions, such as Remove Background, which uses the same
Sensei technology as Select Subject to isolate objects of interest and,
as the name implies, remove the background. Note that the background
isn’t deleted, but hidden on a new Layer Mask; this allows you to fix
any errors, such as the missing part of the roof of this car.
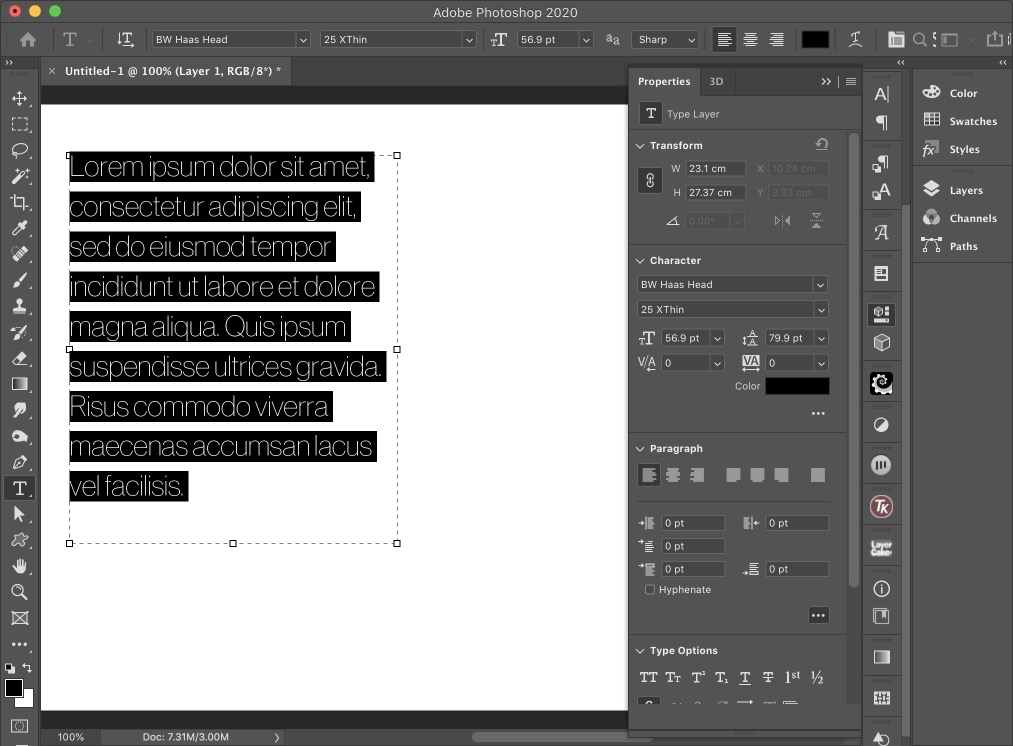
The Properties Panel is especially effective with type,
since it now provides quick access to all the most common typographic
tools, both on a Character and a Paragraph level. There are also Quick
Action buttons at the bottom for converting type into a Frame and into a
Shape object.
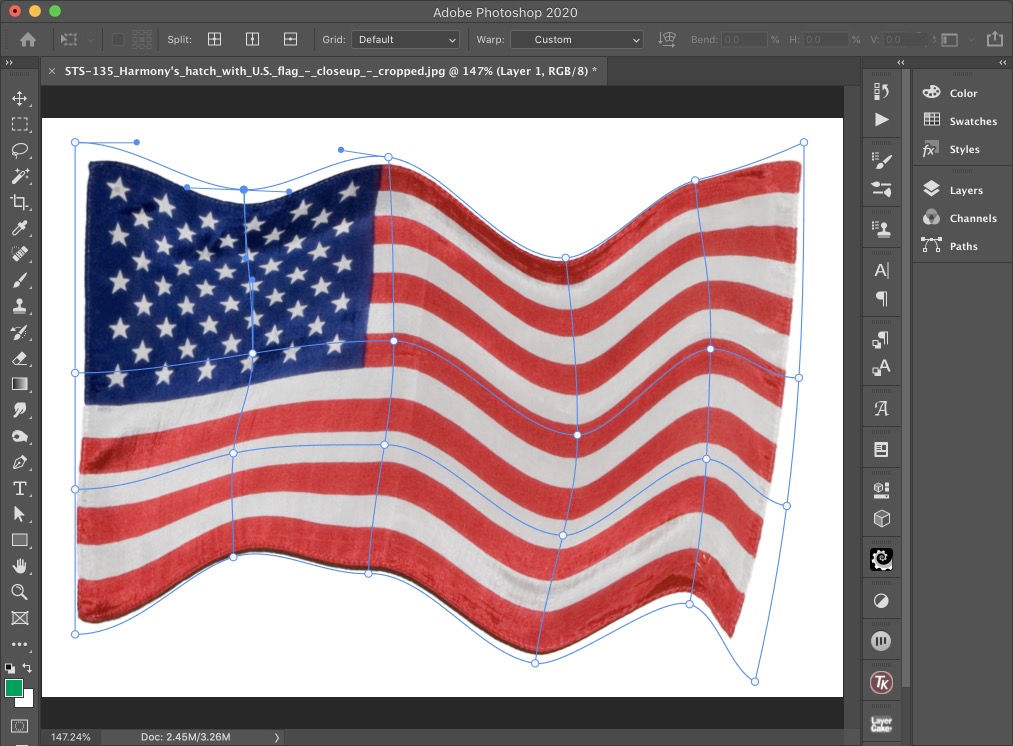
Customizable Warp
The Image Warp functionality has been a useful addition to
Free Transform for many years, allowing you to use envelope distortions
to change the shape of an object. But it has always used a 3 x 3 grid,
which could be limiting. Now known simply as Warp, it starts off with
just four control handles, one at each corner, with Bézier handles on
each to adjust the warp direction and amount.
You can now add as many points as you like within the
warp, either by choosing them from the Options Bar at the top, or simply
by holding Option or Alt and clicking on the image. This provides
tremendous extra flexibility, allowing for the creation of complex warp
effects that weren’t possible before.
New Preset Panels
New panels for Patterns, Gradients and Shapes make their
storage and retrieval much more straightforward, with graphical previews
that show you exactly what you’re going to get. The Shapes panel, in
particular, provides a vastly better way of choosing shapes: dragging
from the panel into the artwork will create a new vector layer
containing that shape.
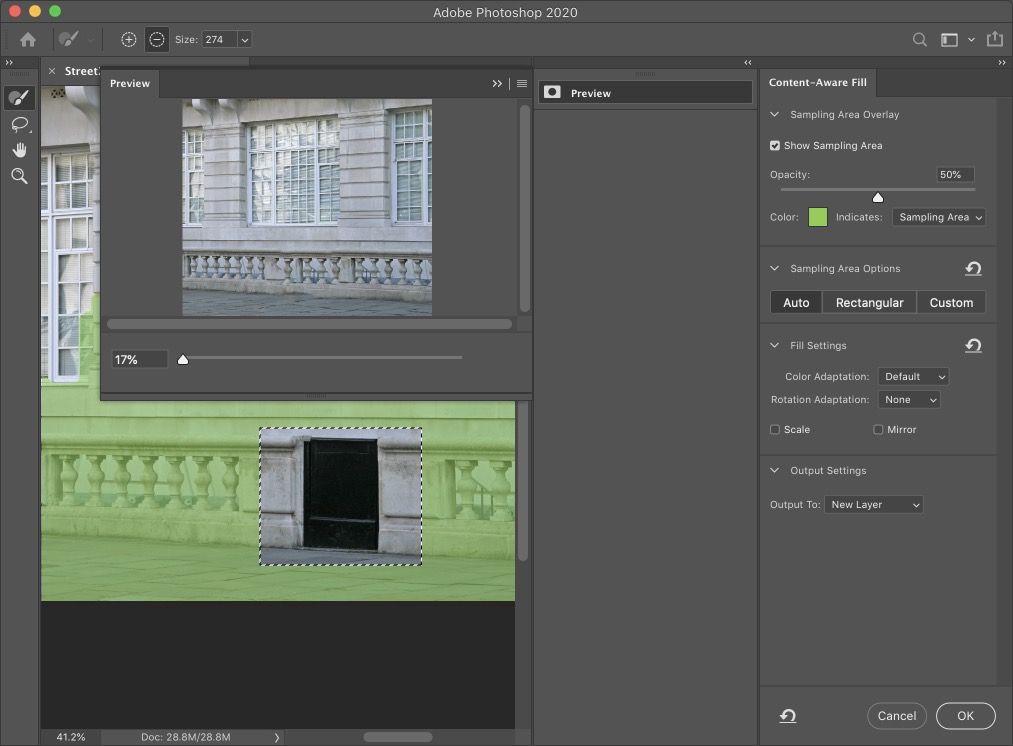
Context-Aware Fill Changes
Context-Aware Fill, formerly a menu option, got its own
dialog with the release of Photoshop CC 2019. Now that dialog has been
enhanced to provide an Auto sampling area, which complements the
Rectangular sampling area that was previously the default behavior. You
can also choose a Custom area if you want to paint the sampling area
yourself, but in practice the Auto area does a reasonably good job in
most situations. And because you can choose to output the patch to a new
layer, it’s easy to adjust it afterwards.
Layer Comps within Smart Objects
The Layer Comps panel provides a way of creating multiple
versions of a piece of artwork, allowing you to move and turn off
elements between different compositions. Layer Comps have always been
supported inside Smart Objects, but in order to switch between them you
have previously had to open the Smart Object in a new window to make the
change. Now embedded Layer Comps are shown in the Properties Panel when
a Smart Object is selected, making it much easier to switch between
different versions of the artwork.
Additional new features
There are many small but useful additions to Photoshop
2020. Constraining the aspect ratio to maintain layer proportions with
Free Transform was introduced in Photoshop CC 2019 – previously, you had
to hold the Shift key to do this; now you hold the Shift key to
unconstrain transformations. But it was applied inconsistently, with
Smart Objects still retaining the old behavior. That oversight has now
been corrected, irrespective of layer type.
Creative Cloud plans now include access to all 17,000
Adobe fonts in what was previously known as the Typekit collection. The
really good news is that you can still access all the fonts even if you
only have the Photography plan, which includes just Photoshop and
Lightroom. The Properties panel now also allows you to access stylistic
sets from those fonts that support them, with plain English descriptions
of the glyphs to be changed.
Smart Objects could previously be turned into regular
layers only by opening the Smart Object in a new window and dragging all
the layers into your document. There’s now a Convert to Layers button
in the Properties Panel, which creates a new group containing all the
layers that were in the Smart Object; you can choose whether to retain
or discard Smart Filters and transformations that had been applied to
it.
The Brush tool has also had a minor update, with the
ability to use the arrow keys to rotate a brush tip as you paint with
it. You can now also hold the Tilde key ~ to temporarily make the Brush
tool into an Eraser.


0 comments:
Post a Comment